
+965 51122049


Hello Engineers. In today's application we will do DC motor speed control with Arduino.
Necessary materials:
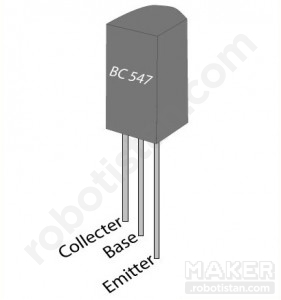
In this application, we will check the DC motor speed using a BJT type transistor. Why do we need a transistor?
We know from Arduino's digital pins that the output voltage is 5V. The 9V DC motor can operate with 5V voltage, but the motor draw current will be well above the highest current value 40mA, which we can draw from the Arduino pins. Here the transistor is switched on.
transistors
We can think of the transistor as a switch that we can control very simply by electric current or voltage. To understand this, let's imagine that you have a NPN-type transistor tap: let's imagine that water flows through a pipe from the transistor collector tail to the emitter tail. We can control the amount of current flowing through the collector from the collector, such as the flow of water from the base of the middle to the flow of water,
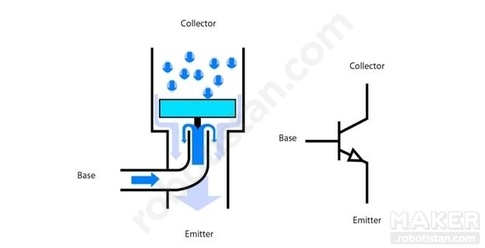
By using very small currents in this way, it is possible to control large current draw devices.
Our circuit schematic:

The task of the diode in the circuit is to protect the transistor from voltage spikes that occur when the motor is in motion from the stationary state.
NOTE: Before I make the connections, I will upload the code to Arduino. Once you have made the connections, let's feed your card with the 9V adapter or 9V battery from the power input on the Arduino instead of the USB connection. Otherwise, we could damage your computer's USB port or Arduino!
With this code, the speed of the motor will increase gradually before; it will decrease in the same way after reaching the highest value:
  int motorPin = 3;


 int fast = 0;


 void setup ()


 {


   pinMode (motorPin, OUTPUT);


 }


 void loop ()


 {


   for (hiz = 0; hiz <= 255; hiz ++)


   {


     analogwrit A (motorp, Velocity);


     delay (20);


   }


   for (hiz = 255; speed = 0; speed--)


   {


     analogwrit A (motorp, Velocity);


     delay (20);


   }


 }
I hope you remember analogWrite () function from our RGB LED application
This time instead of the speed of the engine spontaneously increase, let's check in our computer:
  int motorPin = 3;


 void setup ()


 {


   pinMode (motorPin, OUTPUT);


   Serial.beg the (9600);


   while (! Serial);


   Serial.println ("Enter speed between 0 and 255");


 }


 void loop ()


 {


   if (Serial.available ())


   {


     int hiz = Serial.parseInt ();


     if (hiz> = 0 && hiz <= 255)


     {


       analogWrite (motorPin, speed);


     }


   }


 }
With this code, we can check the speed of the motor with the value we will enter from the serial port screen of Arduino program in our computer. Do not forget to feed the Arduino through the power input with a 9V adapter or 9V battery while working with devices that draw too much current, such as a motor.

The LM35 temperature sensor is an analogue output temperature sensor that performs precise temperature measure...
In this application, we will write text on the LCD screen. In this section, we will first deal with LCD connec...