
+965 51122049


Hello. Today we will connect Arduino with 16 x 2 character LCD screen.
Necessary materials:
In this application, we will write text on the LCD screen. In this section, we will first deal with LCD connections and sample code; in the next step we will print out the information we will get from various sensors.
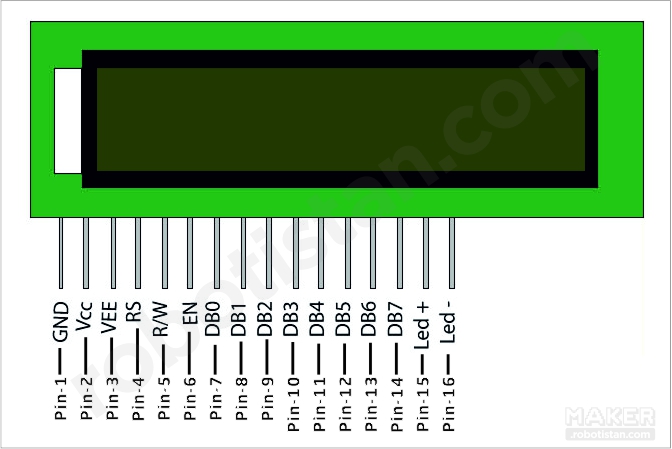
There are 16 pins on our LCD screen. Depending on the screen we use, the pins may be located at the top, bottom, or both sides of the screen. On rare occasions, there are 14 pins on some screens since no backlight is available. Pins 15 and 16 are used to light the screen with screen illumination.
Our connection scheme:
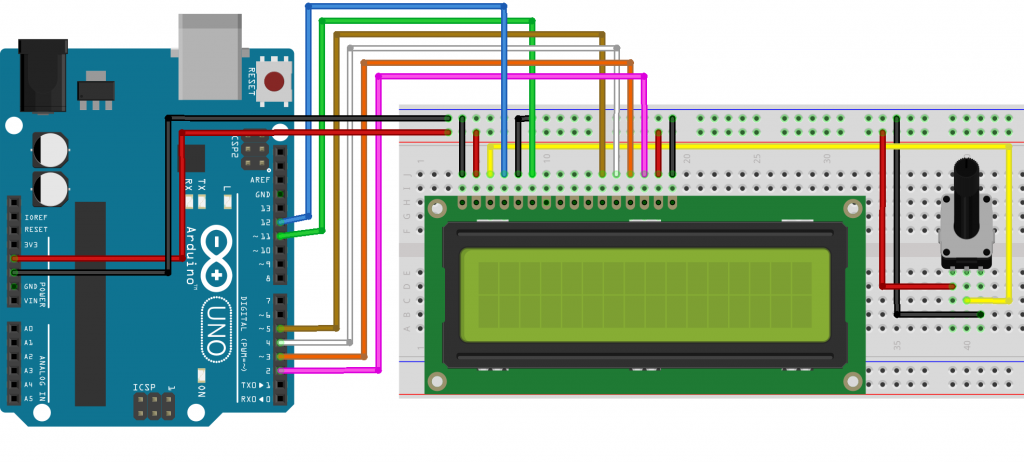 The circuit diagram was updated on 26/01/2017.
Sample code for LCD display is available in our Arduino program. To open this code we need to follow this sequence:
File> Examples> LiquidCrystal> HelloWorld
This code says "hello, world!" On the first line of the display, and seconds since the second line is energized to Arduino. If you do not get any images on your screen, you can change the contrast of the display by turning the potentiometer.
In our next application, we will also perform temperature measurement with Arduino and LCD display. If you want to try this application, you may not want to remove the circuit because the connections are the same

In this application, we will check the DC motor speed using a BJT type transistor. Why do we need a transistor...

The LM35 temperature sensor is an analogue output temperature sensor that performs precise temperature measure...